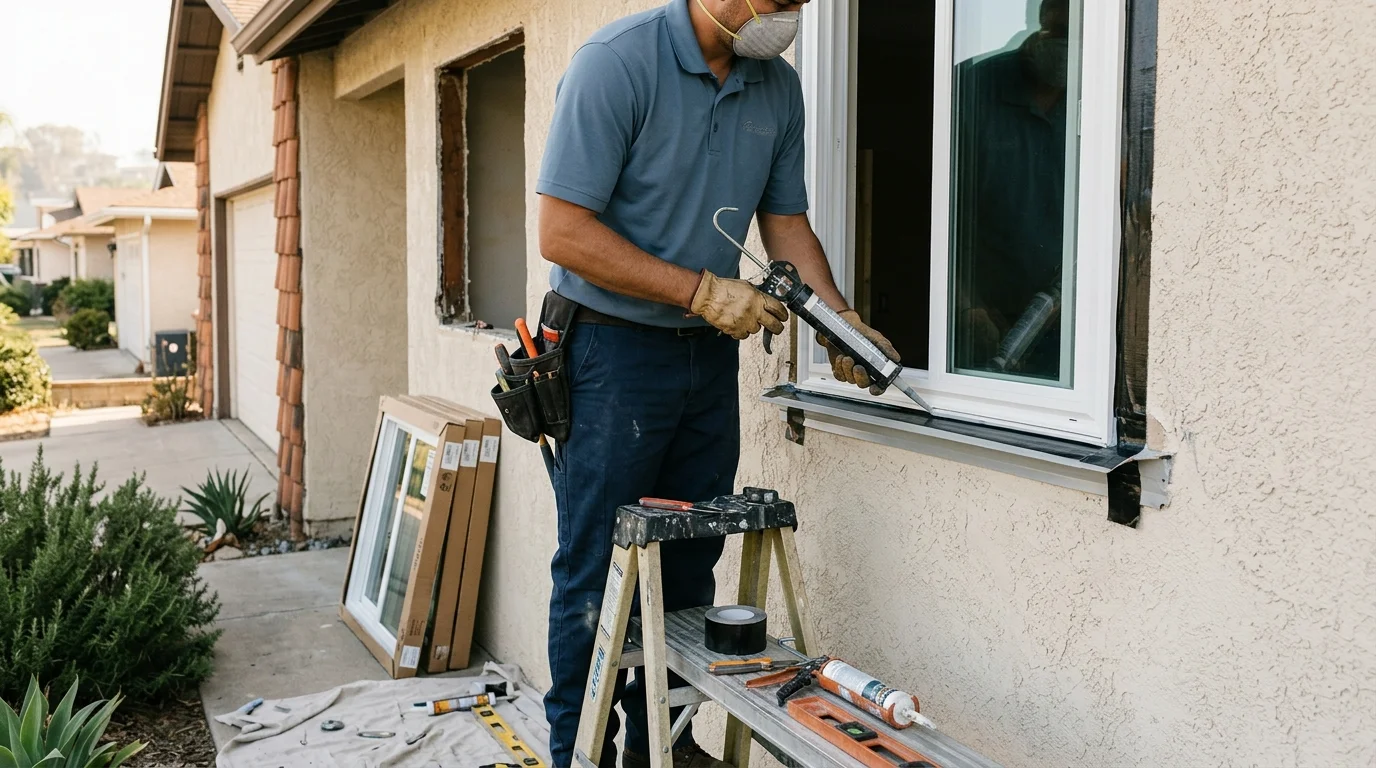
For homeowners comparing windows and installation, the work should follow a clear sequence. The contractor protects the room, removes the old unit, prepares the opening, installs and seals the new window, then checks its operation.
In the City of San Diego, window replacement requires a building permit. Development Services Information Bulletin 203 says a same-size, same-type replacement may qualify for a No-Plan Building Permit, which is still a permit. Other cities and unincorporated areas set their own requirements.
Before the crew arrives: what you clear and cover
Start with the written scope, not the furniture. Confirm which windows are included and which installation method applies. The paperwork should also identify who handles interior trim, exterior finish work, disposal, and permit steps.
Move furniture and loose belongings away from each opening. Take down curtains, blinds, rods, and nearby wall decorations. If a treatment is difficult to remove, discuss it with the contractor beforehand. Don’t assume the installation crew will detach or reinstall it.
Give the crew a clear route between the entrance and each room. Outdoor access matters too. Move patio furniture, planters, and removable decorations that block the opening. Tell the contractor about irrigation lines, alarm sensors, locked gates, pets, or delicate landscaping near the work area.
Ask how the crew will protect floors, counters, and nearby furniture. Confirm whether doors between work areas can remain closed. A clear dust-control plan matters when people are working elsewhere in the home.
The pre-installation inspection should focus on the actual property. A home along the coastal strip shouldn’t receive a copied plan from an East County job. The same applies across inland North County, the central city, and the South Bay. Ask the contractor to identify the wall finish, access limits, existing frame condition, and exterior details observed at your home.
Permit rules also depend on jurisdiction. The City of San Diego bulletin doesn’t settle the rules in Chula Vista, Oceanside, El Cajon, or an unincorporated community. Ask the relevant building department: “Does this exact replacement require a permit, and will changing the opening require plan review?”
Review the expected project sequence before installation begins. Our San Diego window replacement timeline guide explains the stages leading into installation day without promising a fixed completion date.
How one opening goes from old unit to sealed new unit
The contractor should first confirm the opening and replacement unit match the approved scope. This check covers the window style, operation, finish, glass, and installation method. It’s easier to resolve a mismatch before the old window comes out.
Interior and exterior surfaces should be protected next. The removal method then depends on what the project keeps. A retrofit installation usually removes the operating panels or sash while retaining the existing frame. A full-frame installation removes more of the old assembly and exposes more of the opening.
Once the old components are removed, the contractor can inspect areas that were previously hidden. Ask to see any damage, movement, gaps, or questionable surfaces before they’re covered. If the condition changes the agreed scope, request a written explanation.
The replacement unit is then positioned in the opening. The installer checks its alignment and operation before completing the attachment. The exact fastening and sealing approach should follow the product instructions and the conditions around that opening.
Sealing isn’t one bead of caulk applied at the end. The work needs to address the connections between the window, retained frame or rough opening, interior finish, and exterior surface. Ask which joints will remain visible and which will be covered by trim.
Before moving on, the installer should open, close, and lock the window. Screens and removable parts should fit correctly. Visible protective films, debris, and installation materials should be removed as agreed.
You don’t need to direct the technical work. You do need enough visibility to understand what changed. A good explanation should identify what was removed, what remained, how the opening was prepared, and which finishing tasks are still pending.
Retrofit day versus full-frame day
Retrofit and full-frame installations affect different parts of the opening. That difference shapes the removal, sealing, trim work, and final appearance.
A retrofit or insert window fits within a retained frame. The existing frame becomes part of the finished assembly. This approach can reduce disruption around the wall finish, but only when the retained components are suitable for the proposed installation.
Ask what will remain visible from inside and outside. Request an explanation of any caps, trim, or sealant used around the retained frame. You should also understand whether the new assembly changes the visible glass area or the depth of the interior sill.
A full-frame replacement removes the existing window frame and reaches the surrounding opening. It gives the contractor access to more concealed areas. It can also involve more work around stucco, siding, drywall, casing, or other finishes.
Our full-frame window replacement service page explains when homeowners may want a more extensive replacement. The final choice should follow an inspection of the existing opening, not a generic sales rule.
Changing the opening’s size or shape is a separate scope. Don’t treat that work as an ordinary replacement. Ask the contractor and the local building department what plans, approvals, or inspections apply before demolition begins.
Neither method is automatically right for every San Diego County home. Ask these direct questions:
- Which parts of the old assembly will remain?
- What becomes visible after removal?
- How will the perimeter be sealed and finished?
- Who handles stucco, drywall, trim, and paint?
- Does the proposed work match the permit scope?
Get those answers in writing. If you’re still selecting a professional, use our guide to choosing a San Diego window installer. You can also check a contractor’s information through the California Contractors State License Board.
Dust, stucco patching, and paint touch-up
Window installation opens the wall assembly, so some debris is normal. The useful question is how the contractor plans to contain it.
Ask where removal debris will go and how floors will be protected. Discuss furniture covers, room separation, and cleanup before work begins. If someone works from home, identify which rooms must remain usable. Keep children and pets away from active work areas.
Exterior finish work varies with the installation method and existing wall. A retrofit project may preserve more of the surrounding finish. Full-frame work may expose edges that need new trim, stucco repair, or another finishing approach. The written scope should say exactly what the contractor will restore.
Don’t let “patching included” remain undefined. Ask where the patch begins and ends. Confirm whether texture matching, primer, paint, or interior casing is included. If another trade will complete that work, identify the handoff before installation starts.
Paint matching deserves the same clarity. Existing paint can differ from a stored color sample. The agreement should explain whether the installer handles touch-up or leaves a prepared surface for a painter. Avoid relying on a verbal promise made while the opening is exposed.
Look at sealant lines and finish edges in daylight. They should follow the agreed appearance and shouldn’t hide unresolved damage. If something looks different from the approved scope, photograph it and add it to the punch list.
San Diego County shouldn’t be treated as one generic installation setting. Ask the contractor to connect the exterior plan to conditions observed at your property. That conversation should be specific to the coastal strip, inland North County, central San Diego, East County, or the South Bay location involved. Local language alone isn’t enough. The plan should explain what those observed conditions change.
Walkthrough and what to check before you sign off
Walk through every installed window with the contractor. Don’t inspect only the first unit and assume the others match.
Open and close each operating sash or panel. Try every lock, latch, handle, and screen. The movement should match the product and approved scope. If an item sticks, shifts, or won’t close, note it before sign-off.
Look around the interior perimeter. Check the sill, casing, drywall, and nearby paint for unexpected damage. Review the exterior from a safe, accessible location. Compare the visible trim, caps, sealant, stucco work, and cleanup with the written agreement.
Confirm that glass, frames, and screens are free from installation damage. Minor surface dust can hide scratches or chips, so inspect after basic cleaning. Photograph concerns and identify the exact opening. “Bedroom window” is less useful than a location such as “rear bedroom, west wall.”
Ask the installer to explain the window’s operation and removable parts. Keep any product documents provided by the contractor. Window Pro SD doesn’t issue warranties, so questions about product coverage or workmanship terms belong with the independent contractor and manufacturer. Make sure the responsible party is identified in your paperwork.
If a permit applies, ask for its current status. Confirm whether an inspection or other step remains before closure. An installed window doesn’t by itself show that the permit process is complete.
Your final punch list should be written and specific. Include missing parts, finish issues, operation problems, debris, or work outside the agreed scope. Don’t sign a document stating everything is complete while known items remain unexplained.
The final check is simple: each window should match the approved order, operate as explained, and reflect the written installation scope. You should also know who handles every unfinished item.
When to call us
Call when window work requires removal, opening preparation, sealing, full-frame replacement, or permit coordination by a licensed professional. Call us at (858) 400-6418 and we’ll connect you with a licensed local window contractor.